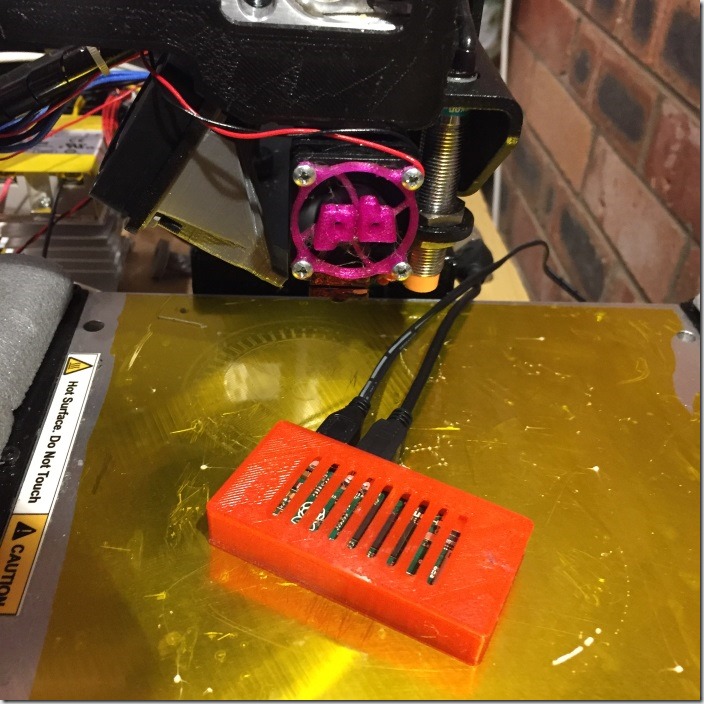
Raspberry Pi Zero Octoprint / OctoPi setup
Written on Dec 2015
I expect this post to age quickly but will hopefully find people setting up OctoPi for the newly released Pi Zero.
OctoPi is a Raspbian image with Octoprint installed and configured on it. Octoprint allows network access and control of a USB connected 3D printer. It is the best thing since sliced bread, in my opinion and it has allowed the whole household to access the printer. The software has also created freedom to control the printer from multiple devices in the house. The webcam monitoring allows progress of prints to be checked too. There is even a mobile phone app now that allows control of the printer from an Android smart phone.
Get the case
House your Pi Zero in a case to protect it or use self adhesive posts to mount it somewhere on or in your 3D printer, remembering to allow access to SD slot and USB sockets. I’d recommend this case I made: http://www.thingiverse.com/thing:1167846
Get the image
If the current release version of Octopi is placed into a Pi Zero, then the Pi Zero will flash the on-board LED repeatedly 8 times and the Pi Zero will refuse to show any output to HDMI and will fail to boot.
This is because the current (Dec 2015) release version of OctoPi (2015-07-02_2015-05-05-octopi-wheezy-0.12.0) is built on the wheezy version of Raspbian. Raspbian is the flavour of Linux operating system developed for the Raspberry Pi devices. The Pi Zero requires the jessie version of Raspbian as a minimum to boot. Luckily the nightly builds of OctoPi are now using Jessie, although the nightly builds are not official releases and may have some issues yet to be ironed out, I’ve actually found them reliable in practice. Download the latest nightly build from the nightly build folder, for example today it is https://storage.googleapis.com/octoprint/2015-12-04_2015-11-21-octopi-jessie-0.13.0.zip, the 04th of Dec being today.
Write the image
Uncompress the zip file and use the resulting disk image to write to your micro SD card that will be placed into the Pi Zero. Follow the standard instructions for writing Raspbian to SD cards. Follow the instructions on “how to use it” here https://github.com/guysoft/OctoPi. Remember to configure the network settings in the network text file located in the root directory of the written SD card.
Plug in the Pi Zero and 3D printer
Use a micro-B USB on the go to USB A female cable adapter, to plug in a (powered preferably) USB hub, into which you plug a WIFI dongle and the printer. Next plug in the micro-B USB power to the right hand socket, this is the dedicated power socket, does not do data and also note the data USB socket next to it cannot be used to power the Pi Zero.
Boot and using a web browser browse to http://octopi.local or find the IP address your network has assigned to the Pi by checking the router or DHCP services.
At this point you should be up and running.
Printrbot, Pi Zero & USB 3.0 Hubs
Trying to connect Printrbot Simple Metal Printrboard to the Pi Zero resulted in no serial port being listed in OctoPi. The message on trying to auto connect was:
Failed to autodetect serial port, please set it manually
Connecting to the OctoPi via SSH and looking at the $ dmesg output revealed issues with the Pi identifying the Printrboard, which presents itself as a serial device.
device descriptor read/64 error -71 dwc_otg
This normally indicates a power issue, but the hub is a Amazon Basics USB 3.0 powered hub, so this seems unlikely. From the previous Pi to the Pi Zero, the printer has moved from being directly plugged into the Pi to going via the hub, due to the Pi having no internal USB hub.
After some research it turns out that support for USB 3.0 hubs might not be very good on the Raspberry Pi. I tested this by getting a simple, old unpowered USB 2.0 hub out the drawer, much to my delight this worked allowing the printer to be detected by OctoPi.
Please comment if this was helpful as it motivates me to write more!


